

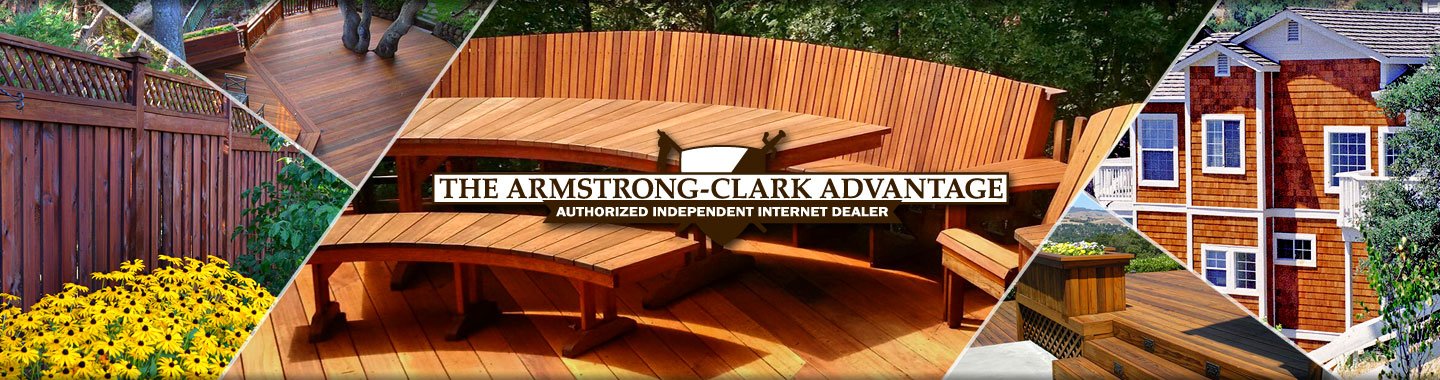
The Armstrong Clark 2019 Contest Results can be seen here: 2019 Armstrong Clark Stain Contest
 The ArmstrongClarkStain.com 2020 Spring/Summer Restoration Contest is closed!
Thanks to all the entered this year. Excellent job to all and we appreciate you entering our ArmstrongClarkStain.com staining contest for 2020!
We will contact the winners via their orders.
First Place
Jessica (Page 2)
First Place = $500 + 5 Gallon Pail of AC Stain
Second Place
Matt (Page 1)
Second Place = $350 + 3 Gallons of AC Stain
Third Place
Fred Shenkman (Page 3)
Third Place = $200 + 2 Gallons of Ac Stain
Sorry for all that did not win the prizes. We were extremely impressed with all the feedback and entries this year!
Armstrong 2020 Clark Stain Contest Details
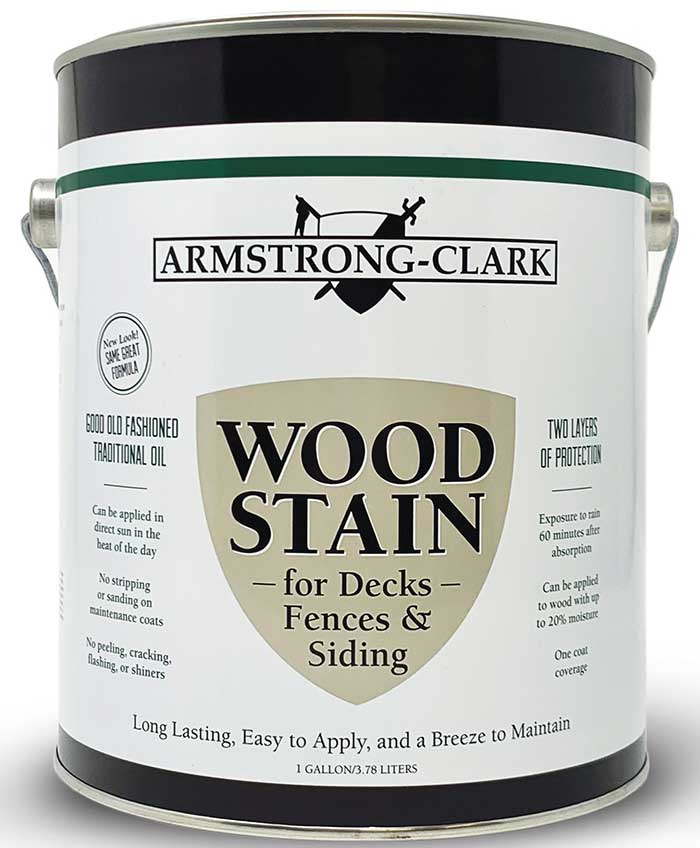
- All Armstrong Clark Stain and Prep products must be purchased first from this online retail site (ArmstrongClarkStain.com) between January 1st – Sept. 14th, 2020.
- The deadline for entry is Sept. 30th, 2020.
- The winner will be decided by October 15th, 2020 by our team.
Contestant winners will receive
- First Place = $500 + 5 Gallon Pail of Armstrong Clark Stain of your choice!
- Second Place = $350 + 3 Gallons of Armstrong Clark Stain of your choice!
- Third Place:= $200 + 2 Gallons of Armstrong Clark Stain of your choice!
How To Enter Contest
- Enter by Sept. 30th, 2020.
- In the comment section below, post a short description of your deck/wood staining project, the products used to prep, and the Armstrong Clark Stain and Color used. Examples of wood projects that can be entered: Decks, Fences, Wood Side Homes, Log Cabins, etc.
- Add 2 before prepping pictures of the wood that was restored (no more/less). You can still enter if you do not have the before pictures. Decks, wood fences, wood homes, etc are allowed.
- 2 after staining pictures must be included (no more/less).
- If having trouble uploading the pictures, please make your picture(s) size smaller (below 1 MB).
Any questions or issues posting, please ask in the comment area.
We look forward to all Armstrong Clark Stain entries!
*Disclaimer: All products must be purchased from ArmstrongClarkStain.com. The contest is not open to products purchased from other online dealers or from physical retail stores.


George 09/30/20: Denver Colorado completed fence project; used Armstrong Natural Oak Semi-Transparent stain on 6×6 rough cedar posts and 1″x6″ smooth cedar boards. I let the fence stand for~ 3 months before stain and applied a cleaning agent before staining.
I’m a 57 year old guy who works behind a desk but fancies himself as a handy-man from time-to-time. I had a deck, boathouse floor and screened in porch with an early version of Trex. After 15 years, the light grey boards were turning black in parts and green in other parts (see attached).
I hired our neighbors’ son, who put in Ipe decking and cable railing with Ipe hand-rails. He did a great job, but tried to stain it with something water-based and not made for Ipe. It looked terrible (see attached). Ipe is too expensive to end up with a deck that looks like that!
Mind you, I have never stained a deck, or really anything. With some fear, I took over. I consulted Uncle Google and ordered an AC sample – Mahogany colored Ipe Stain. I stripped (using someone else’s product because I was impatient), power washed and sanded the above deck. Nope. So I stripped again with AC RAD stripper, power washed, applied AC Brightener to neutralize, power washed, and sanded. That did the trick. I had calculated that I needed 5 gallons of stain, so I ordered 6. I used the 5 gallons (brush work only, thank you) with just enough left-over to refill the little AC sample can. The remaining gallon will go to maintenance and Ipe hot tub steps, that I hope to build this Fall.
The results attached. Not bad for a first-time duffer, I’d say! Thanks, AC.
PS I know it’s too many pics, but I kind of think of this as several projects. My poor legs would agree.
We recently purchased our home and the cedar siding was very dark and weathered. We wanted to restore the color and condition the boards to prevent having to replace the siding. We cleaned the house with a power washer and the Stain Shop Wood Cleaner and couldn’t believe how much lighter and brighter the siding was after this step. We chose the Armstrong Semi-Transparent Cedar Stain which brought out a beautiful color to the siding while allowing the grain to show; conditioned the wood; and straightened the curled-up bottom edges of the boards that occurred from years of weathering. We applied the stain with a Graco sprayer and also brushed the stain. We did the work ourselves and were so impressed with the quality of the stain because on the two estimates that we acquired for staining the house before we started this project called for two coats of stain. One coat of stain was all the house needed and we couldn’t be happier with the results and the quality of the Armstrong products.
Years (2011) we put in an IPE deck and I looked online and “thought” we had applied the correct stain after oodles of research – all that hard work and it was a complete disappointment. So much so that we did not touch the deck again until we researched and researched – we chose Armstrong Clark – Mahogany and now are very pleased with our deck. We can’t tell you how many times we have been asked about this stain! It made an instant curb appeal change that made people specifically ask about it! It not only looks great but was easy to apply and was not frustrating to apply ta-boot! Here are a few pics: We used the restore a deck then followed as directed with the head turning Armstrong-Clark Mahogany stain! I understand you all did not do the work but we cant thank you enough for a product that everyday normal home owners can apply! Its FANTASTIC!!!
Our Deck is approximately 8 years old. When the deck was initially built, we used a Behr deck stain. It lasted about two years before all of it completely peeled off. We sanded all of the board surfaces down to bare wood and used Benjamin Moore Arborcoat this time. That lasted less than two years as well. This time we disassembled the entire deck every board, ran the boards through a surface planer on both sides, then planed off all the edges of the board’s then routed new radius on all the board edges and then completely sanded every board. We then applied two coats of Armstrong Clark Semi-Solid Espresso. All I can say is the results are amazing. By far the best outdoor stain product I’ve ever used.
I’ve always wanted an outside shower and finally put this 4’x7′ one together. It’s now the nicest looking bathroom in/well..on the house. I used 1×6 T&G cedar trimmed with PT 2x4s and 4x4s and solid mahogany post caps. Despite traditional advice to let the cedar weather, I decided to stain before construction so that all sides and edges would be protected. And WOW! Am I glad ! While pretty unstained, the cedar grain really popped once stained as you can see in the attached photos.
I used Restore-a-Deck Cleaner before staining, then brushed on one coat of Armstrong Semi-Transparent Cedar. I couldn’t be happier, and my wife loves it too. Evening sunsets over the hayfields have become our favorite shower times.
It was the summer of the best of decks; it was the summer of the worst of decks.
This summer was supposed to be simple: refurbish our redwood decks; maybe sanding one. First one was easy.
I built this about 10 years ago, using under-deck fastening; so there are no holes in the horizontal surface. No splitting, no corrosion and easy sanding when that becomes necessary. First few times, I used Penofin, but it darkened unacceptably even with careful preparation and application. A local recommended Armstrong-Clark. It was a good call. First the color is amazing! But also the application process is much easier; my 83 year old knees weren’t looking forward to traversing the deck again: apply to an area and then to immediately wipe it down to help with the discoloration that I knew was coming. But with Armstrong Clark I used a pole-brush, followed by a rag-on-a-pole wiping, and it was done..
The first picture it is mid-staining –a combination of before and after:
It’s now four months later and the deck still looks great.
Now to the “worst of decks.” We also have an upstairs deck; over a bedroom, and thus have a “membrane-and-stringers” system to carry off water. It was built in 1992 and needed attention this year. During the power washing I noticed that some boards were very loose and discovered that corrosion had set in around some screws. Further inspection let to dismay: the contractor had used sheet rock screws, not deck screws. They had corroded, turning into wicks that drew water though the membrane and into the stringers. So this became a deck rebuild.
I looked for scheme that would give me a fastener-free surface like the other deck. But there I could crawl under the deck, installing the planks from below while teaching the neighbors’ children some new words. The former was not possible with this deck; as it developed, there were plenty of opportunities for the latter.
The idea of a “floating deck’” made of “tiles” was attractive; commercially available tiles were not: too small, too expensive. So I designed my own tile-system of planks held together with dowels (like leaves in a table) with the single 1500 pound tabletop, fastened to the sidewalls with a “crown moulding” that would also leave fewer hiding places for … well … for leaves.
“The best laid plans…” effect soon came into play: first the roofers cut stringers whose heights were too variable and shimming was needed. But a second problem arose: some of the redwood planks were bowed. Lashing a couple together (and shimming) solved that problem … for a while. Soon it became necessary to slash triples, so simple 50 pound tiles became 150 pound boat-anchors. But the system did work.
Next picture is a “before” picture with the exposed 28 year-old select-heart redwood railing system now free of what the house painter called Cabot’s “bark mulch stain” and what I called (among other things) “brown paint” and the newly installed but unstained redwood “table top” and moulding.
Then another pre-stain picture with other (finished) deck peaking through the shrubbery below
And finally the completed project:
Again it was A-C transparent redwood that made this result shine. The same application process as before: long-handled brush followed by a pass with a rag-covered deck broom. Eezy-peezy. This did take longer than expected. I knew it was to be a one-man job but I didn’t count on the smoke and ash from the Santa Cruz fire just over the hill.
Lessons? Fastening planks from below is a winner. No nails or screws to corrode or to impede a sander when sanding is needed. And (beside my knees) the big winner was the A-C stain: trouble-free application and a beautiful result.
Now what to do with an unopened gallon of Penofin? Well, Halloween is coming; perhaps I’ll surprise some parents? 😉
My project was a new backyard cedar fence. I prepped with Restore-A-Deck Cleaner & Brightener. It was amazing just how much mill glaze and dirt was removed with those products. Then I did two coats of the Semi-Transparent Rustic Brown stain, plus a third coat on the posts and horizontal boards to add a little accent and depth. It turned out beautiful!
Striped and stain with chestnut
Railings
This is my renovation of our 16×16 deck with the stairs and railings.
It was done in three stages. 3 years ago when we moved in I replaced all the boards with treated pine 16x6x2 boards. This year in June I sanded it and stained with Armstrong Clark semitransparent cedar stain. In August I replaced the railings, renovated the stairs by flipping over the old boards and sanding them. I stained railings and the stairs with leftover from June 5 gallon Armstrong Clark semitransparent cedar stain.
This turned out perfect, just the way I wanted highlighting the new wood and hiding the blemishes of the old one.
Our project was a 6 year old deck, stairs and skirting – we swept the deck within an inch of its life and used the Restore-A-Deck kit. I had watched all the videos (some a couple times) and followed all the instructions to the letter. After using the Restore kit, we were amazed at how great the deck looked even with the stain. This product did exactly what it said it would – thorough rinsing is a key part of the process. After 2 days of drying out after the cleaning stage we embarked on the staining using Armstrong Clark Semi-Transparent Cedar. Again, I’d watched the “how to” videos which were very helpful. I used a small roller and paint brush – I was careful NOT to back brush as per the instructions. We let the stain sit as directed and then all areas were wiped down with a rag. We opted for only 1 coat of stain. We have had no stain transfer whatsoever either when we completed the staining nor anytime after. Our project was completed in May 2020 (timing of the before photos) and the after photos are Sept 2020 – the deck has looked great all summer and the stain looks as good as it did in May when it was applied!
This is the other photo with cleaner and brightener.. sorry
The other photo
2 photos I used restore deck cleaner and brightner
The other 2 photos are 1 coat natural oak semi transparent. . Very easy to use and excellent coverage with 1 coat
We built a new rough cedar heavy timber pergola and stained with Armstrong Semi transparent black walnut. Turned out awesome.
*Natural oak not golden oak. Please excuse the misnomer
Here are the before pictures of the doors for the shed.
The before pictures did not load
We completed a new shed-built this year and decided to stain the doors which are built from scratch. I researched several oil stains online and ordered samples. I decided on using the Armstrong Clark semitransparent redwood for the shed doors. We are very happy on how it turned out.
Hello all, I began the renovation of my 23 year old cedar deck that had several coats of solid stain on it in March. My plan was to replace some obviously rotted boards and strip the rest. Well when I started to rip up boards I saw that there were more rotted boards than expected. I decided to rip up all the boards and replace them with new cedar. Much to my surprise when I went to purchase the new cedar I found out that there was a shortage in the northeast of all outdoor lumber. Apparently with the unexpected free time everyone had the same idea as me. The only thing available was pressure treated pine and it was slim pickins at best. So I played the hand I was dealt and purchased the treated lumber from 3 different sources. I just hoped it would look good after staining. Thank goodness I stumbled on to Armstrong Clark when researching stains. I went with the restore a deck cleaner and brightener 2 bags of each. I also used 5 gallons of the cedar on the majority of the deck, 2 gallons of the golden oak for the “walkway” and one gallon of the black walnut on the posts,rails,riser and trim around the walkway. As recommended I did one coat now and will follow up with a second in the summer. Thanks to Armstrong Clark the deck came out aces.
thanks
Gerry
ps good luck to all the contestants
Here are the four photos, for Mike. Sorry about the first post with too many photos !
The year is 2000, my wife Amanda and I do not have our three children at the time and actually she wasn’t quite yet my wife, we were about to get married.
I had more money pre children so at the suggestion of a friend we decided to build a mahogany deck, so glad we did!
With a lot of help the deck came out very well… 13 years later with three small children we decided our home was too small so we moved the deck with an excavator, to accommodate for an addition off of the back of our home. The deck sat to the side of our yard under trees and there it sat for almost 8 years growing moss and algae and the wood almost looked unsalvageable.
My wife researched online and came across Armstrong Clark. She purchased the restore a deck kit step one and two and I spent a couple afternoons using the restore a deck stripper and brightener making sure to follow the directions to a T.
Our deck Is 12×20 so we were able to buy the small 2 pound bags.
Since the wood was so dried out and old we decided to buy 2 gallons of the Armstrong Clark mahogany wood stain.
so glad we did!
our deck looks nearly new again after 20 years of abuse and at one point during that time putting a really terrible Cabot stain on, that completely took away the beauty of the mahogany and the grain of the wood.
I owe it to my beautiful wife for researching and finding this amazing product.
thank you to Armstrong Clark for suggesting the restore a deck treatment because that took off years of grime and two layers of the poor quality cabinet stain that we had installed.
are used about 1 1/2 gallons of the Armstrong Clark mahogany stain are used a wool pad and a high-quality stain brush to install the first coat and for the second coat I was able to quickly and lightly go over it wet on wet with the wool pad.
The very next morning the dew from my roof beaded up very nicely showing the moisture protection that the Armstrong Clark stain added so quickly.
we would highly recommend the entire kit to anyone who wants to revive their deck whether you are using hardwood or softwood I did also use it on the sides of the deck which were pressure-treated and it also worked extremely well.
Its so encouraging to find a high-quality product that we can continue to use on our outdoor spaces. Thank you for considering us for the contest!
Mike Amanda and the boys !
Sorry, fixed the photos.